Mini split units are very popular with many DIY homeowners since they are low-cost to install compared to traditional HVAC systems.
There are many advantages to a mini split and installing a unit yourself, which helps save on cost. The units also have high efficiency, making them cost less to operate compared to other HVAC systems.
After installing many mini split packages over the years, below are some tips and tricks I have found and used when installing a new system.
Tips and Tricks for DIY Mini Split Installations
- Use a Pre-Built Pad or Cylinder Bricks
- Use 3-Inch PVC Pipe for the Hole
- Use Tubing Bender Springs
- Examine the Manufacturer Flares
- Use a 4-Inch Line Set Cover
- Use Nylog for Fittings
- Use A Torque Wrench for Fittings
- Test Switch
- Smartphone Controller Module
Many DIY installers pour a small concrete slab for the outside unit to sit on, but there are other options.
Small pads can be bought either in plastic or types with a covering that looks like cement.
Two-cylinder bricks can also be used but often don’t look as good as the small pads.
These small pads are a great way to install a new unit without having to mix concrete and pour a pad.
They work well and are what most professional HVAC companies will use when doing an installation.
Pre-Built mini split pads are low-cost items that work well and make a job easier when a pad is needed.
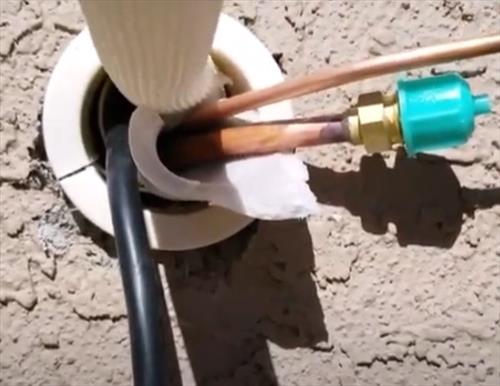
Many kits come with a 2-1/2 inch pipe for the hole that is drilled into the wall for the line set, drain line, and communication lines.
This is often a tight fit, and it can be hard to get everything squeezed into the opening.
Using a 3-1/2 inch PVC pipe can help give more space to fit the line into with the inner dimensions of 3-inches.
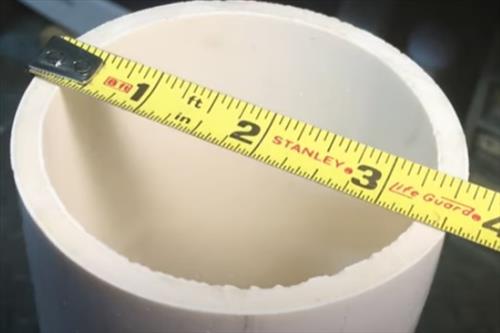
When using a larger opening, it also helps when bending the line set since a smaller space makes bending it harder.
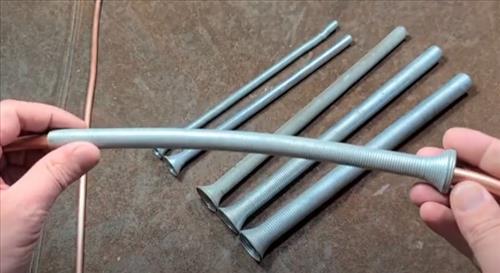
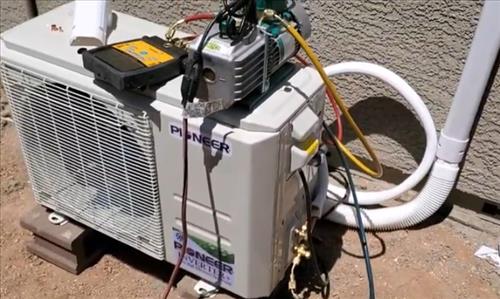
One of the most common problems when installing a mini split, is bending the line set without kinking it.
If it becomes kinked, it will need to be cut, flared, and bolted together.
While there are pipe benders, they don’t work well close to the wall where the line set comes out the back of the inside unit.
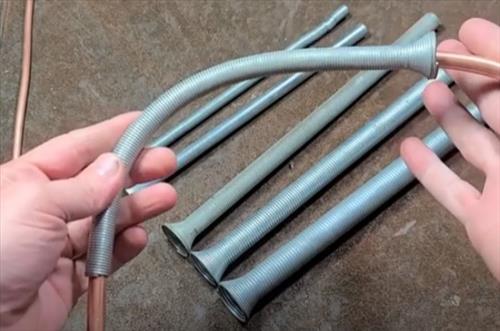
Using spring benders helps to bend the copper lines without kinking them.
The one downside to bender springs is the manufacturer flares will need to be removed, which many do anyways since they notoriously leak.
Example Tubing Bender Springs on Amazon
Armour Line RP77210 Tubing Bender Springs
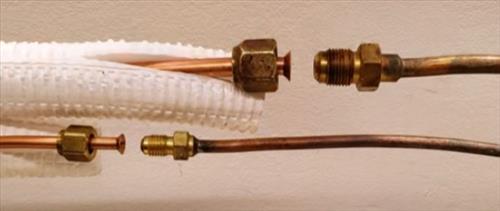
One of the most common failures after a mini split installation is leaking connections due to a bad manufacturer flare.
The manufacturer flares are notoriously bad, and many installers will automatically cut them and make new flares.
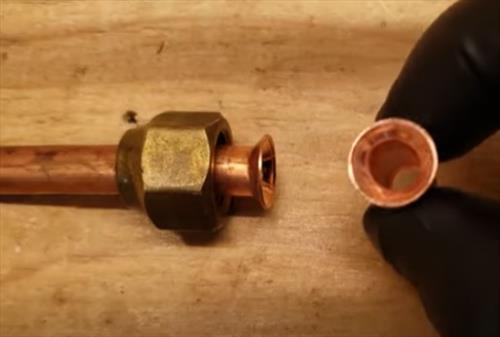
There are good manufacturer flares but be sure to examine them before bolting them together.
Any burrs or badly flared joints have the potential to leak and cause issues.
There are many YouTube videos on spotting a bad flare, but basically, it should be no burs inside, and the angle should be even all the way around.
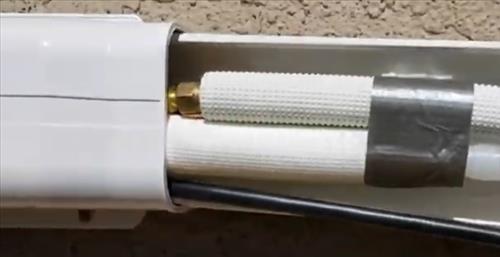
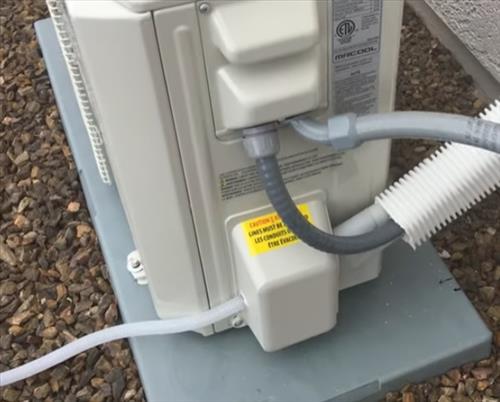
Line set covers are a necessary component to not only make a unit look more decorative but also protect the copper pipes, drain line, and communication wires.
There are many line set cover kits available, most with a 3-inch wide space to fit everything into it.
While everything can usually fit, it can be tight, and any bends in the line set need to be very close to the wall.
A 4-Inch line set cover gives extra space, which can often help to not kink the line set and have everything placed inside better.
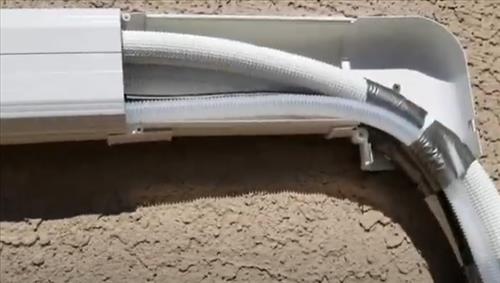
A larger cover can be extra helpful if there are multiple bends on the outside wall, such as going around a window.
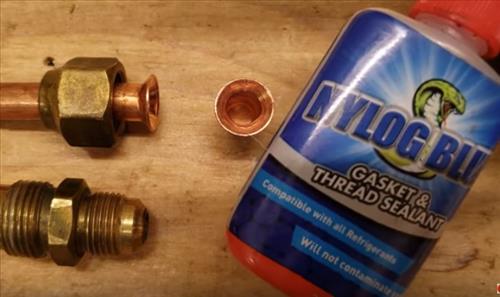
Nylog helps to seal the connections and is a small extra step to help prevent any leaks.
It is commonly used to help seal up line-set connections.
Using it is simple, by placing a small drop around the tip. Only a small amount is used on the tip, so none get inside the tube.
Nylog is a low-cost item that can help to prevent a leak that will cost much more to fix.
Example Nylog on Amazon
RT201B Nylog Gasket/Thread Sealant
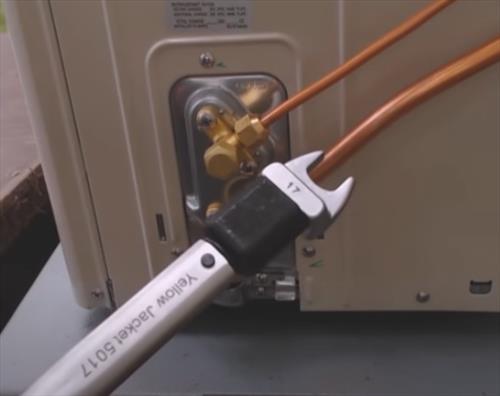
If you have experienced tightening flares and other bolts, you will likely not need a torque wrench.
If you are not experienced, a torque wrench can tighten the flares to specifications.
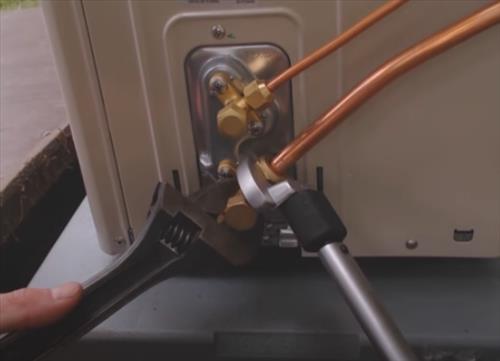
This can be invaluable to anyone wondering if the flares are tight enough without over-tightening and stripping the threads.
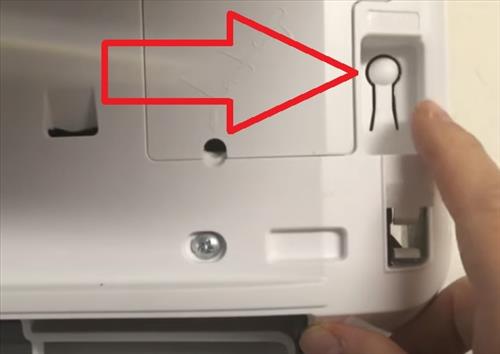
There is a switch on most mini split units located inside the front cover on the right side.
It is used to test if the remote control does not work.
If you install a system and the remote control does not work, you can use this switch to see if the controller is bad or if the unit is bad.
Be sure to check your manual as there are differences between manufacturers.
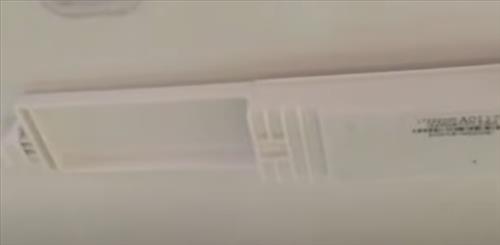
Many units such as Pioneer and Mr. Cool have a module that can be bought separately, which allows the system to be controlled by a smartphone.
It is inserted into a slot on the inside cover and will make the unit a smart unit able to work with smartphones, tablets, Alexa, and more.
Be sure to check your manual as some units may not have the option.
Summary
Installing a mini split is not too difficult, but small things can cause problems.
After many installs, the tips above are a few of the things I have learned to do which can be helpful.
For example, when I first installed units, I never examined the manufacturer flares and had an issue on the seventh install I did.
A few days after the installation, the unit was blowing out water inside with condensation on the inside condenser.
The cause was a bad flare that had slowly leaked out all the refrigerant.
After this, I always examined the flares and used Nylog to be sure they sealed.
This is only one example, with no doubt many other tips and tricks that can be done.
Do you have any tips or tricks when installing a mini split unit? Let us know in the comments below.
Hola,buen día, escribo desde Argentina. Quería consultarte que cantidad de metros de caños minimos utilizan en tu país para la conexión desde la unidad interior hasta la exterior? Y porque?