Mini Split air conditioners are very popular since they are very efficient to run, can both heat and cool, and can be installed by Do-It-Yourself individuals.
There are many kits available that can be bought online that come in different sizes.
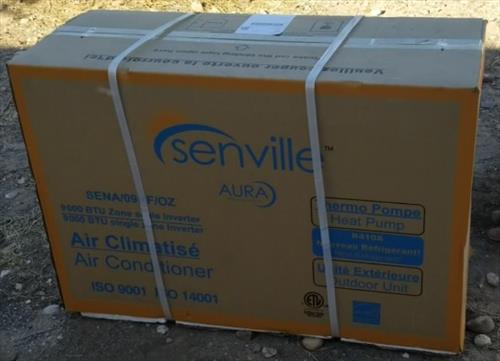
Senville is one such manufacturer of Mini Split heat pumps and has 9000, 12000, 18000, and 24000 BTU units available.
I installed a Senville 9000 BTU 230 Volt unit with how I installed it below.
A video is also posted at the bottom of the page of the installation.
Senville DIY Mini Split Kit on Amazon
Senville AURA Series Mini Split Air Conditioner Energy Star Cold-Climate Heat Pump, 12000 BTU, Compatible with Alexa, White
Below is how I installed a Senville Mini Split. Be sure to follow the instructions that come with any unit bought. If in doubt, be sure to call a professional.
The unit will come with installation instructions.
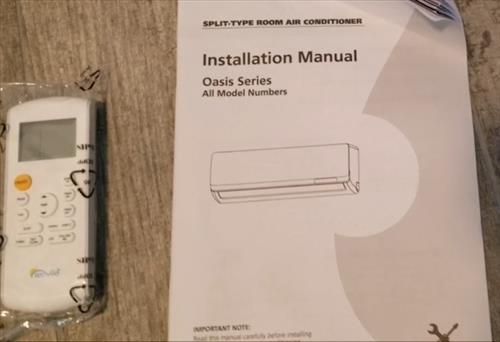
Be sure to follow the installation manual that comes with your unit.
There are some tools that will be needed, such as a vacuum pump and manifold gauges.
There are many low-cost vacuum pumps and gauges, and I bought some budget ones to do the installation.
Here is the Vacuum Pump I bought on Amazon
ZENY 3,5CFM Single-Stage 5 Pa Rotary Vane Economy Vacuum Pump 3 CFM 1/4HP Air Conditioner Refrigerant HVAC Air tool R410a 1/4″ Flare Inlet Port, Blue
Example Budget 410a Manifold Gauges on Amazon
ZENY Diagnostic A/C Manifold Gauge Set R22 R134a R410a Refrigeration Kit Brass Auto Serivice Kit 4FT w/Case, 1/4″ SAE Fittings
Some other basic tools will also be needed, such as a Drill, Screwdrivers, and wrenches.
Most Mini Split systems will need a 5/16″ Female Coupler to 1/4″ Male Flare to connect the manifold gauges to the unit.
Example 5/16″ Female Coupler to 1/4″ Male Flare Adapter on Amazon
PIONEER Air Conditioner Ductless Mini Split System charging vacuum port adapter, Converts new R410a style 5/16 SAE service ports to accept older 1/4 SAE gauge hoses.
A 3-inch hole saw bit is also needed to drill a hole for the line-set and wiring to go between the units.
How To Install Senville Ductless Mini Split
- Install the Electrical
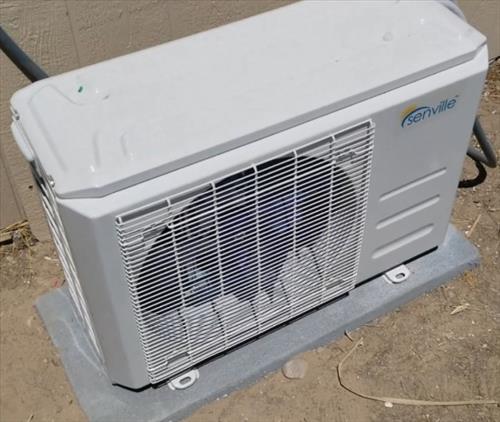
- Set Outdoor Condenser on Pad
- Mount the Inside Unit
- Connect the Communication Wires
- Feed Line Set Out Hole
- Connect the Copper Line-set
- Connect Outside Communication Wires
- Vacuum Down the System
- Release the Refrigerant into the System
- Test the Unit
Always follow the manual that comes with your unit for the wire Gauge and breaker Amps.
The first step is to lay out where the unit will be located and run the electrical.
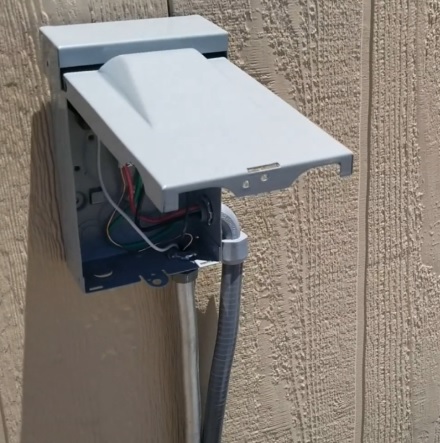
The unit I received needed to be on a 20 AMP breaker which can be run to an electrical panel or on its own box.
I added in a 20 AMP breaker at the main panel and installed a disconnect box which simply breaks the flow of electricity when work is needed on the unit.
The unit I received used 12 Gauge wire.
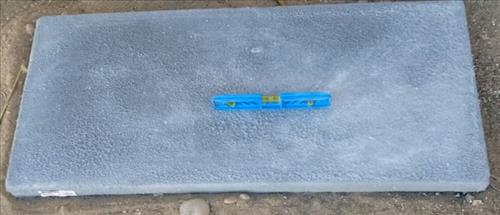
A pad for the outside condensing unit to sit on needs to be set up. The unit needs a flat solid surface that is level and solid as to not move about.
If the outside location already has concrete, it can simply be set on it.
If there is no pad, one can be bought, or a small cement pad can be poured.
Small pads are low-cost items that can also be purchased, and what I used.
Example Mini Split Pad on Amazon
DiversiTech UC1636-3 36 Inch Wide Equipment Pad for Mini Split Condensers
When the pad is set up, be sure it is level and set the outside unit on top of it.
Next, the inside unit will need to be mounted onto the wall.
A few things need to be done before it can be mounted.
First, the mounting bracket will need to be screwed onto the wall and level.
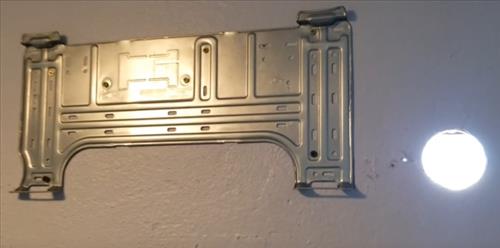
The mounting bracket is on the back of the inside unit and snaps out.
Be sure to mount the bracket on a good stud, so the unit is secure.
A hole will need to be drilled to run the line-set and wires to the outside unit.
Look at the back of the unit for where the line-set and wiring stick out for the location of the hole needing to be drilled.
The instructions will also have a template to show the location and size of the hole through the wall.
I used a 3-inch hole saw to drill an opening for the refrigerant line and wiring to go to the outside unit.
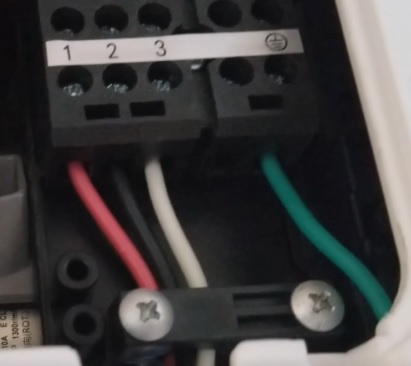
Hook the wiring harness to the inside unit, which is labeled 1, 2, 3, and ground.
Be sure to follow the schematic in the manual or on the inside door for your unit.
The connectors are located under the front panel under a pull-out on the right side.
The wire harness will need to be fed in from the back.
One problem I had was the wire color codes were not exactly the same as the wiring harness sent to me.
This is not much of a problem as the inside, and outside units are labeled 1-2-3 and ground. If this happens, simply be sure the wire color matches inside and out.
For example, red would be connected to the connector labeled 1 inside and outside.
Feed the line set and wiring out of the hole and set the unit on the mounting bracket.
The wires, line-set, and drain line all need to be fed out of the 3-inch hole and the unit mounted on the wall bracket.
Be sure to be careful with the copper line-set as it cannot be kinked or will block the flow of refrigerant.
Everything will stick out the hole from the inside unit.
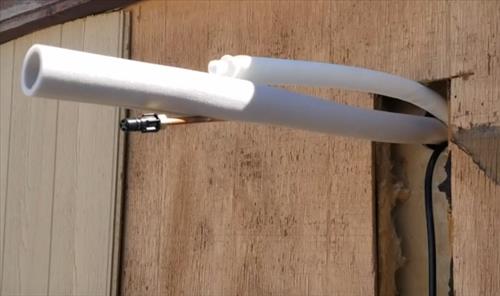
For this install, the line-set was run inside the wall. Most installs will have to go on the outside and install a mini split cover kit to hide it.
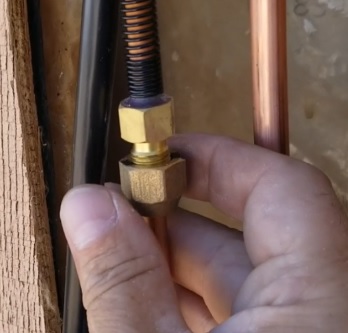
Next, the copper line-set needs to be screwed together.
When installing the line-set, the main thing is to not kink the copper lines and screw them together so as not to strip the bolt threads.
This is easy enough; simply take your time by rolling out the copper line-set and hand tightening the connections before using a wrench.
Screw the bolts together carefully, making sure not to strip the threads. Once hand tight, use a wrench to tighten them up and get a good seal.
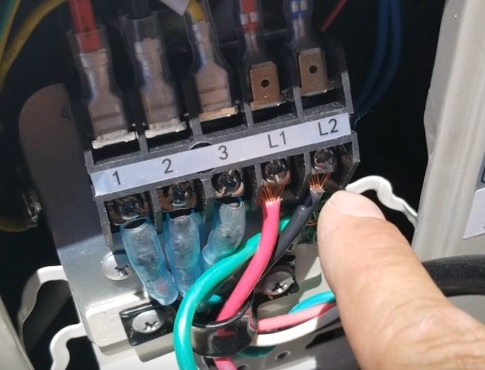
Hook up the wiring harness communication wires to the outside unit.
Again follow the schematic that comes with the unit.
Be sure the connectors labeled 1-2-3 and ground match the inside wall unit.
The L1 and L2 go to the breaker for power. This unit used 240 volts on L1 and L2.
Read here for more on how to wire up a mini split heat pump.
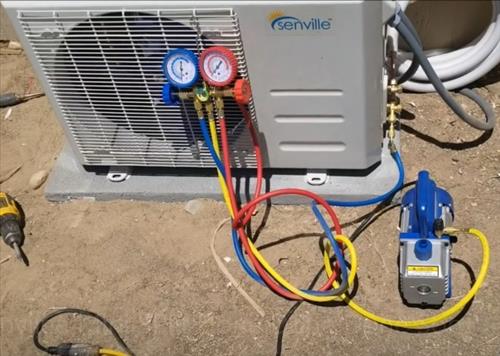
Once everything is installed, the line-set will need to be vacuumed out with a vacuum pump.
Using manifold gauges and a pump hook up to the low-side port on the outside condensing unit. It is the only service port on the unit.
Let the vacuum pump run for 20-30 minutes, pulling a vacuum. After 15-20 minutes, turn off the vacuum pump and watch the manifold gauge pressure.
For example, here, it is hooked to the Blue Gauge, and the pressure is negative with the dial under the zero marker.

It should hold a negative pressure; if not, there is a leak that needs to be fixed.
Let it sit for at least 20-30 minutes or more, and be sure it holds a negative pressure.
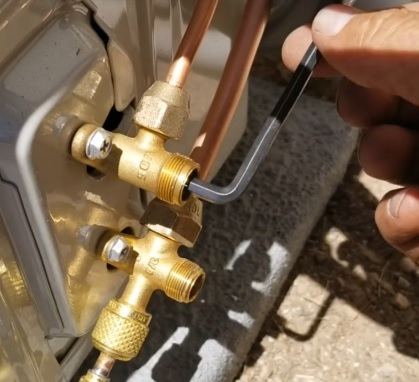
Once the line-set has been tested for any leaks and has a vacuum, the refrigerant can be released.
Both the high and low sides will need to be released. This is done by removing the caps and using an Allen key, turning them counter-clockwise to the left.
They will need a few turns for the valve to come fully open and have a stop when all the way out.
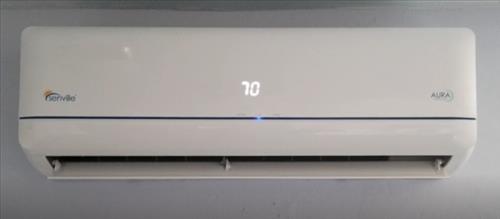
Once the refrigerant is in the system and powered attached, the unit is ready to be tested.
Power on the unit using the remote control. The center shows the temperature the unit is set at when it is turned on.
Summary
Installing the Senville Ductless mini split was not that difficult and fell into a handy person Do-it-yourself category.
Of course, if you have never done any basic construction or electrical wiring, be sure to call a professional.
If you decide to install a unit yourself, be sure to read the instructions before starting.
Plan the install over a 1-2 day period and take your time. While it can be installed quickly, it is best to go slow.
This install took me roughly 5 hours, but I have installed many units before.
Every install will be a bit different since the electrical box locations, walls, and other things can change a layout.
Video Instructions
I get a flashing code 03 PC code on the unit. Does anyone know what that code means.
Thank you
The condenser’s Minimum Circuit Ampacity and Max Fuse are both rated at 15 Amps.
So it appears to me that a 15 Amp double-pole circuit breaker and 14/2 (Canada) romex are correct.
Why did you use a 20 Amp circuit breaker and 12/2 cable for your 9000 BTU Aura mini-split installation?
Hi,
My Senville outdoor unit has 5 ports and on the top is the service port. Their Instalation Manual is very brief and missed the steps as they mix up the wirk on setvice port and the work required on the packed valves (precisely, when to open the valves) I am not sure how to proceed. I found two brief explanations on YouTube, but not complete process. Please help me if you know how to proceed because the Senville techs are useless here in Canada. Thank you!
Instructions to install senville heat pump was very understanding and straight forward .
Thanks guys.
I am trying to install my unit but when I flip on the circuit breaker it pops instantly. There is a short in line somewhere. I disconnect from the unit and no problem. I use multimeter at unit and no shorts when disconnected. when I connect to unit and turn on pops again. Looks to me like something wrong with the unit. Your thoughts.
Your video is very helpful thank you. I want to know how is the adapter to the vacuum looks like? Is it a special adapter? Thanks
I just finished installing a 11,000 BTU Senville ac split unit in my house. Now comes to the final step that is to vacuum the unit. Your video is very helpful thank you. I want to know how is the adapter to the vacuum pipe looks like? Is it a special adapter? Thanks
Is there an external wall mounting bracket available for the 12,000 BTU Senville unit? Also, does all the needed hardware come with the unit or are there additional parts to be purchased?
Thank you.
There are external wall brackets to mount the unit that can be bought along with pads for the ground. They need to be bought separately. Everything is included with the kit except the electrical for the 240 volts.
I just installed my 24000BTU Senville Mini Split, like the others…. does not turn on, no led light.
I see others had the same issue? What was the fix?
Remote works yet no Led
The usual cause of no power is a bad connection in the communication line run between the two units.
Hey, we just installed the same unit and it will not turn on at all. Did everything by the book. Nothing. Help……
Are you getting power to the outside unit? Are the batteries good on the remote control?
Hi,did you figure it out? We just installed and have no led indicator on, it does not work at all.