If you have installed a mini split and it stops working after a few days it likely has a refrigerant leak.
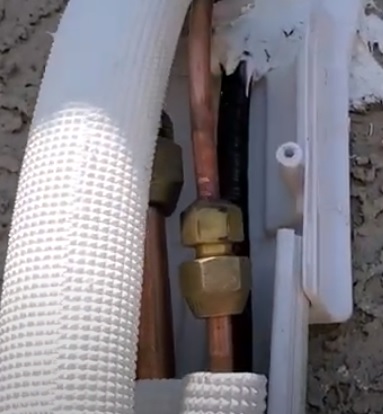
The factory flares that come with mini split units are notoriously bad and often leak.
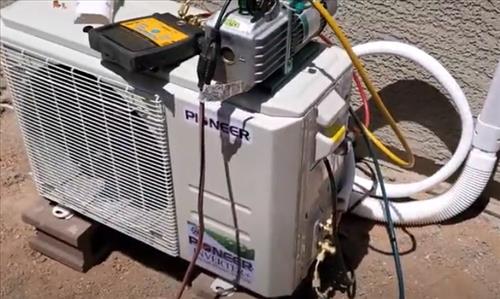
This recently happened to me that after installing a Pioneer mini split it stopped working after a week.
I went to look at the unit, and water was dripping from the inside wall unit along with moisture on the low-pressure line (big copper line).

I had used the factory flares many times, so I hadn’t inspected them all that well when installing the unit and had simply bolted them together.
Keep in mind after installing many mini split units; this has rarely happened, with the overall majority of factory flares never leaking.
But it should be a warning to always inspect them very well and look for any small burrs that can cause a slow leak.
What Do You Do If You Have Bad Flare on a Mini Split Line Set
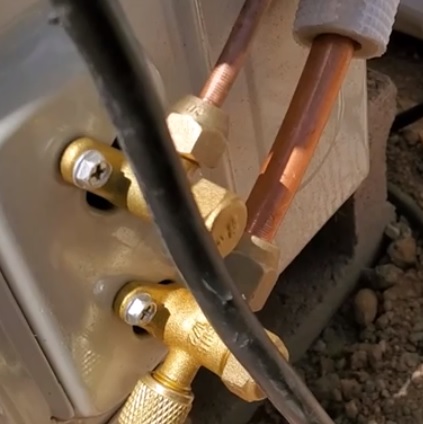
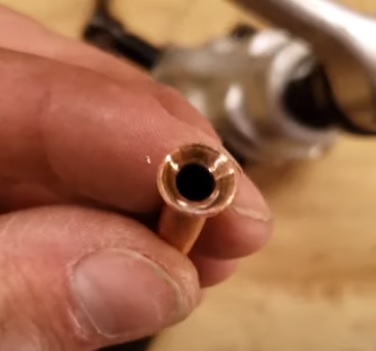
The first step is to remove each flared end on the line-set and inspect them.
If there is any sign of a burr or bad flare, cut it off and flare the end of the line-set with a new flared end.
After the line-set has a good flare, bolt them together again and test that it holds a vacuum and add refrigerant back into the system.
What To Do After a Bad Flare on a Mini Split is Fixed
- Vacuum System Down
- Check for Leaks
- Refill with Refrigerant
Once the flared ends are good and not leaking, the unit will need to be vacuumed down, tested for leaks, and refrigerant added.
Keep in mind the leak could possibly be somewhere else, with the flares the most common problem with a new install.
Vacuum down the system and be sure it holds.
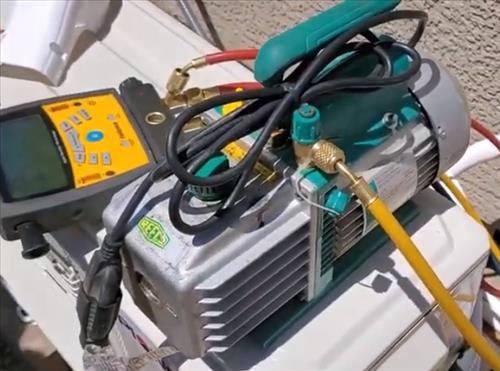
The most common method is if a unit holds a vacuum for 20-30 minutes, it is good to go but can sit for longer for a better test.
Letting a system sit for a while, even overnight, can test for a very slow leak.
Most HVAC techs now use digital gauges or micron gauges to get an exact reading on a vacuum.
Pulling a system down to 350-500 microns is common but be sure to check the manufacturing requirements.
Some HVAC techs also use Nitrogen to test for leaks which is added into a system at around 150-200 PSI pressure testing the system for leaks.
Most often, if you can pull a vacuum down to 500 microns and it holds after several hours, there is not a leak.
Example Micron Gauge on Amazon
Elitech PGW-500 Wireless Digital Pressure Gauge HVAC
Refill the Mini Split with Refrigerant
Refilling the refrigerant is the last step, with more refrigerant needing to be bought.
The most common refrigerant for a mini split is R410a but be sure to check the tag on the unit, which will have it labeled.
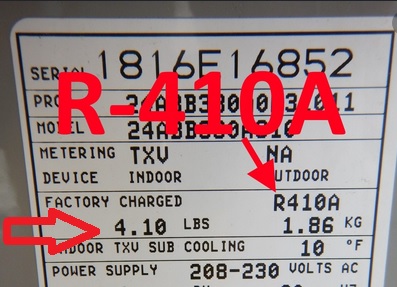
The amount of refrigerant to add in pounds is also labeled on the tag on the outside condensing unit.
Refilling an HVAC unit such as a mini split is done by weight with a scale.
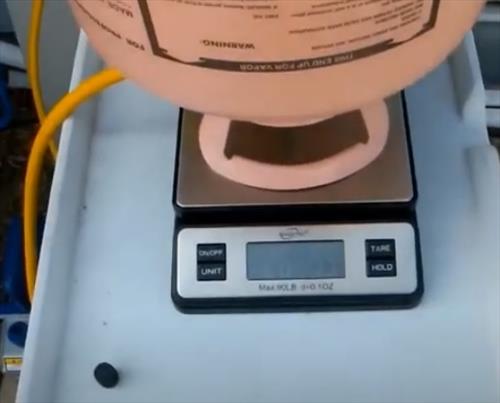
The tank is set on top of the scale, and refrigerant is added by the manufacturer labeled amount in pounds.
Summary
If you find yourself with a leaking line-set and a unit that has lost all the refrigerant, the fix is straightforward but more involved.
The leak will need to be fixed, tested, and refrigerant added back into the system.
This may be beyond the scope for many, with calling an HVAC tech possibly the best approach.
Tools and refrigerant will be needed that may not save money to fix a single unit.
An HVAC tech can likely fix a unit in roughly 1-2 hours.
Of course, if you have the tools and refrigerant, it will likely be worth doing it yourself.
Have you had a mini split line-set leak refrigerant after an install? Let us know your story below.
I have the same question as Kevin…
Hey, I had a faulty factory flare actually shear completely off and release all the refrigerant. After I replace the flare and leak test, when I go to vacuum down the whole system, should I vacuum with the hi and low sides of the outdoor unit open? In other words, should I vacuum the condenser unit as well? And likewise, when I add r410a back into the system by weight, should the valves to the condenser both be open? Thanks!
If there is no refrigerant in the condenser the ports will be open and the whole system will be vacuumed down from the low-pressure port. The valves will also be open when adding.