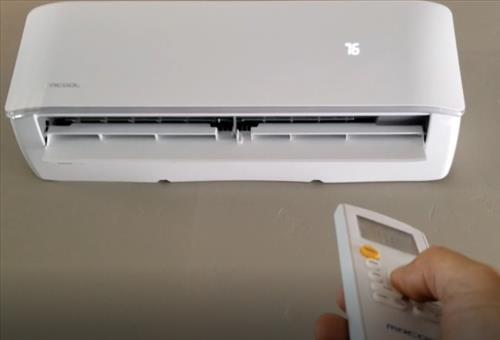
Do-It-Yourself mini-split heat pumps have become very popular since they work very well and are perfect for the DIY type person.
They save money since no HVAC company is needed and work very well at heating and cooling room additions, garages, or most anyplace heating and cooling is needed.

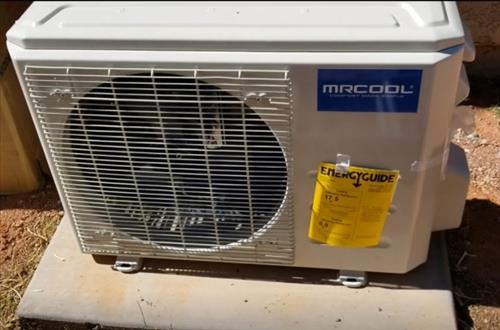
MRCOOL is one such mini split manufacturer that makes it easy for a DIY mini-split project.
A unit was sent to me, which I made a video of installing it along with this post.
The video is at the bottom of the page for a visual walk-through of the installation.
MRCOOL Mini-Split Quick Connect Line Set
One of the things that makes MRCOOL units different from other mini split kits is there is no need to vacuum down the lines.
Most units need a vacuum pump and gauges to pump the line-set down before releasing the refrigerant.
MRCOOL line-sets are already in a vacuum and have a seal that is broken when bolted onto the outside condenser.
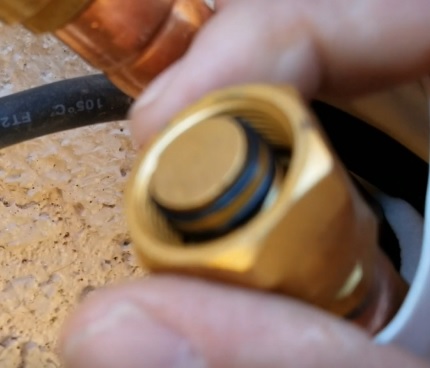
They have a seal that is broken once the line-set is tightened onto the outside condensing unit.
This makes it much easier to install since there is no need to vacuum/pump down the system.
All the parts come in three boxes except for the AC electrical, which needs to be bought separately.
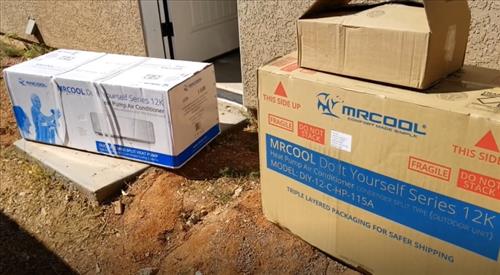
The boxes come with everything needed for the setup including the inside wall unit, outside condenser, line set, wrenches, and hole saw.
Things not included are electrical, mounting pad, and line-set cover, which need to be bought separately if needed.
*This site contains affiliate paid links for which a commission earned.
MRCOOL Mini Split Availability
Available Here on Amazon
Available Here on eBay
Electrical Not Included
Like all mini-split kits, the electrical is not included and needs to be bought separately.
Every electrical setup will be different since the location of the unit and power always changes.
If you have no idea how to wire the unit, be sure to call a professional.
Mr. Cool has both 120-volts and 240-volt units, so be sure to wire in the correct voltage for the unit you bought.
The unit I had needed 120 Volts with a 20 Amp breaker. (Be sure to check your manual for electrical requirements.)
This is a common voltage and amps for rooms and garages.
Of course, running its own breaker to a panel is ideal and the best option when possible.
I decided to tie it into the existing wiring in the garage. I installed the unit, which has a 20 Amp breaker.
I installed a disconnect to run power to the unit.
I also have a 240-volt outlet in my garage, so I will not need to pull much of any more amperage from the 120 volt outlets.
Of course, I can always run a dedicated line later if there is a problem.
Electrical Parts I Used From Amazon
The steps below are how I installed an MRCOOL Mini Split. Be sure to follow the instructions that come with your unit.
How To Install MRCOOL DIY Ductless Mini-Split Heat Pump
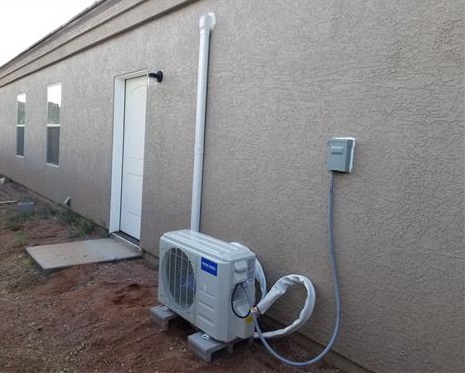
- The first step is to lay out where the inside and the outside unit will be located.
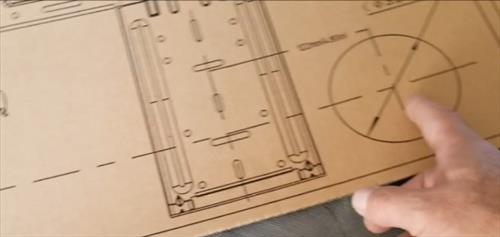
A 3 1/2 inch hole will be drilled through the wall to run the refrigerant line-set and control wires.Also, the AC wiring must be thought out for the best way to get power to the unit.
- Once the location is known, the wall bracket needs to be leveled and mounted on the wall.
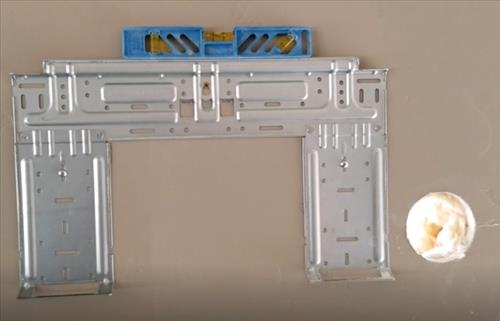
This will hold the inside unit, so be sure to mount it on some good studs.A template is included in the kit to mark out and drill the 3 1/2 inch hole.
A hole saw is also included to drill out the hole once marked. - Once the wall bracket is mounted and the hole drilled, the inside unit can be placed on it.
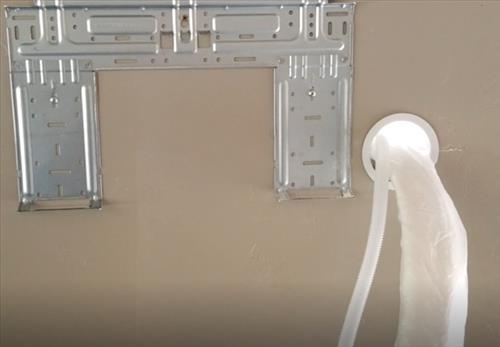
First, run the line-set and control wires out of the hole, and the inside unit will clip onto the bracket.The line-set is 25 feet, so most of it can be fed out the hole before picking the inside unit up.
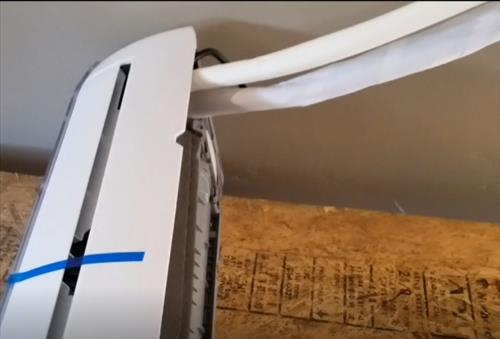
The inside unit will clip onto the bracket.
It would be best to have two people when setting the inside unit if possible.I placed the unit on my own, and it is not hard, but pushing the last of the line-set through the wall and clipping it into place would be much easier with two people.
- The outside condensing unit will need a solid flat surface to sit on.
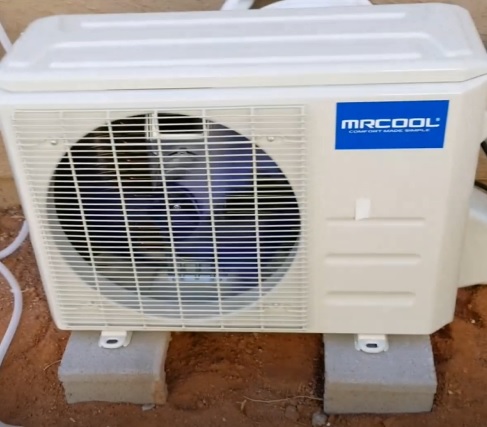
This can be done with a small cement pad, store-bought pad, or bricks.
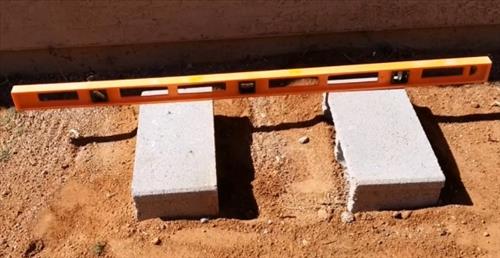
I decided to use bricks but any method will work as long as it is solid and level.Here is an Example Pad On Amazon that also looks and works well.
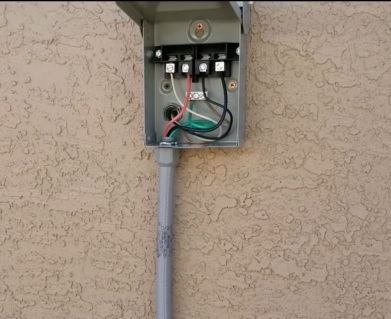
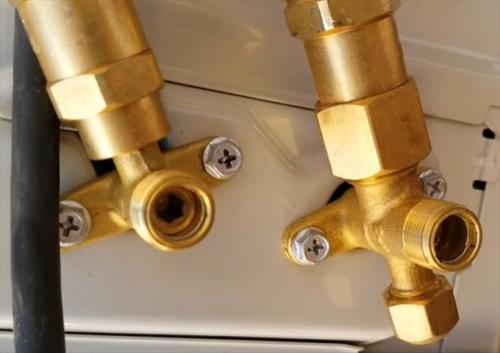
Diversitech EL3232-2 E-Lite Plastic Condensing Unit Pad, 32x32x2″ - The two refrigerant lines need to be bolted onto the outside unit. Be sure to read the instruction manual for the steps.
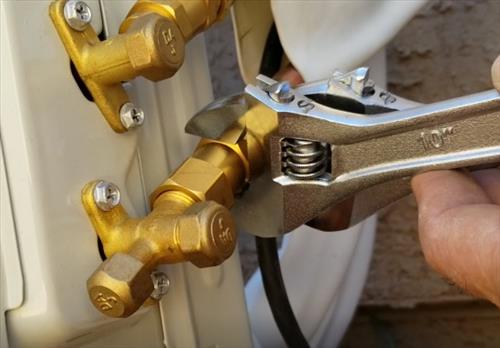
Basically, the lines are hand started and then tightened with the two crescent wrenches, which are included in the kit. - The outside unit will need to be wired for power and the wires from the indoor unit.
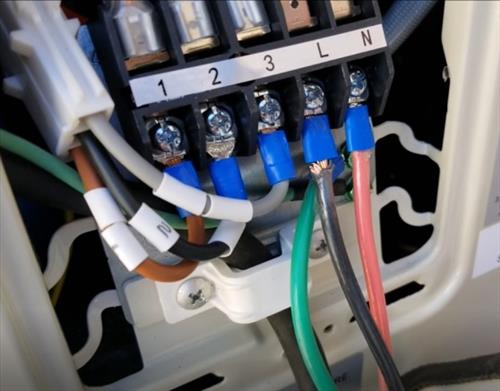
The unit I have uses 120 volts on a 20 Amp breaker which goes to the labels “L” and “N.”The inside unit has a wire clip that runs with the line-set that simply snaps together.
Of course, be sure to call a professional if needed.
- The last step is to let the refrigerant loose into the system with the Allan key.
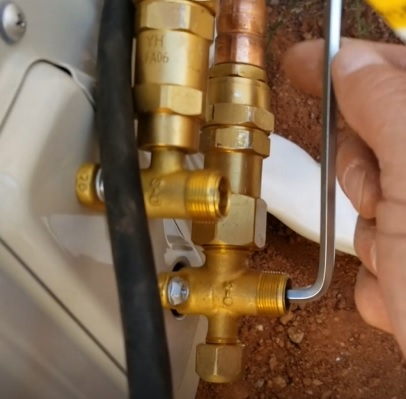
There are two valves that let the refrigerant loose on both the high and low-pressure lines.
They will turn counter-clockwise and need several turns to fully open. - After double-checking everything is correct, power can be turned on, and the unit tested.
Summary
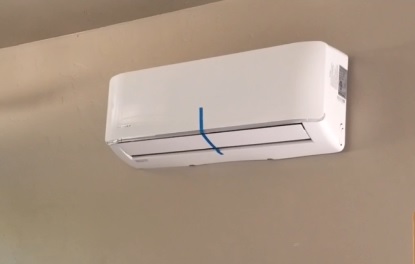
Installing the MRCOOL DIY Ductless Mini-Split is not hard for a handy person and is a great way to save money.
It is a great way to add heating and cooling to a garage, room addition, trailer, or any place it is needed.
Of course, if you have any doubts, be sure to call an HVAC tech.
I was able to install the unit within 4-5 hours, but I have installed many mini-split units.
It would be best to plan the installation over two days along with a helper if possible.
Testing the unit, it is working very well, both heating and cooling. I am sure it will work very well in the garage.
It also has WiFi built-in, which I haven’t tried out yet but plan to do so soon and will write a post on it when I do.
I covered the line-set with a cover kit to clean it up and make it look good.
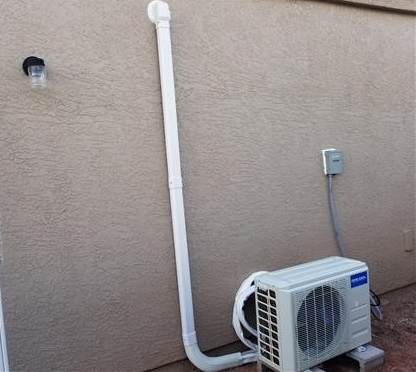
While tape can be used to hold it all together line-set cover kits are low-cost items that make it look professional and what I use.
*This site contains affiliate paid links for which a commission earned.
Here is the line-set cover kit on Amazon I used
Decorative PVC Line Cover Kit for Mini Split Air Conditioners and Heat Pumps
I am still testing the unit so far with good results and will update if anything changes.
As always, be sure to read the reviews on Amazon, forums, or elsewhere to be sure a unit is a good fit for you.
Thank you for finally providing an answer on how to get from the disconnect to the unit!!!
Is the indoor unit powered via the “communications wires” or does it require a separate power source?
Powered by the communication wires.
Hey Aaron your video is very helpful. I do have a question about the line set. Could the hole be bored in the center of the bracket? It looked like it could but it only showed 2 options on the template.
In the manual they specifically say not to bore the hole to the left (or center really) and keep it where the line set exits the air handler. I think that is suggested so you don’t have to do a sharp bend of the copper which would probably have a bend radius under their 4in minimum they suggest in the manual. And that’s to prevent the pipes from being dented/kinked I believe.
That disconnect is a 60 amp non-fused. Is the point of that to just have a way to cut the power, because it would never hit 60 amps. I thought I needed a 30 amp fused with 25 amp fuses. Thanks!
Do you have a PDF of the template?
Sorry I just have the cardboard template the unit came with.
Did you bolt down the exterior unit to the brick or is freestanding on the brick?
No it just sits on the bricks. It doesn’t move or vibrate.
Do all Mr Cool units have line-sets that are already in a vacuum and have a seal that is broken when bolted onto the outside condenser.?? I am looking for a 24k btu unit. Thank you. Your video was a great help.
Only the Comfort Made Simple DIY series has a vacuumed line set. I just installed a MrCool Advantage 24k btu unit and had to use a vacuum pump. The diy set is easier to install but it cost about $600 more than their Advantage series.
The Advantage does come with the condenser fully charged with refrigerant. After you vacuum the system down you turn two Allen head valves on the condenser to release it into the rest of the system.
I just want to know 220 or 240 volts
box said 230
Did you find out? Just ordered one that says 230 as well.
The mini split voltage regulator will work with any of those voltages. 220-volt 230 volt and 240 volts all are all wired in the same.
I just installed a 12K DIY 3rd Gen w/ a pre-charged line set and it also comes in 24K.
Wondering how it is going. No problems yet? I am thinking about having a Handyman install a two head Mr. Cool. I worry about quality and especially how to deal with product problems if that arises. I see the customer service is terrible..
Hi, thank you for this helpful post ! We are thinking about installing a MRCOOL unit and wondering how well the unit heats, especially in low outdoor temperatures ?
Does it shut off if the temperatures drop below 25 for example.
Thanks
Pia
It works well in the winter with temps down to about 15 degrees. I’m not sure what the low temperature it is rated for.
May depend on your model, but the specs are all on their website at mrcool.com/documentation.
For example, the 12k looks like it can heat at outdoor temps as low as -22 degrees F. “https://mrcool.com/wp-content/dox_repo/mc-diy-es-ss-en-01.pdf”