Mini Split kits are great HVAC units to install, with many DIY kits available.
Many homeowners save money installing mini split systems, but sometimes problems can come up.
Installing the line-set is one part that seems difficult but is a straightforward DIY job.
Flaring the copper line-set is one such task that sometimes needs to be done when the old flare is bad.
Keep in mind most DIY mini split kits come with the line-set flared and simply need to be attached to the inside and outside units.
If there is extra length in a line-set it can be rolled up in a loop behind the outside condenser.
Rolling up any excess line is the most common install method, but some do prefer to cut the line-set to size.
Another possibility is if the factory flares leak and need to be re-flared.
What Is a Mini Split Line-Set?
A line-set is two copper lines that transfer refrigerant between the inside and the outside condensing unit.
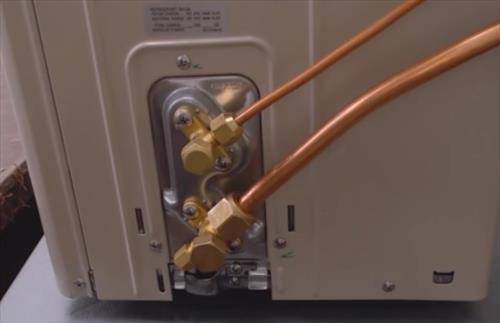
The larger line is called the low-pressure line, while the smaller one is called the high-pressure line.
Refrigerant is pumped in a cycle, transferring heat inside or outside depending on the thermostat setting.
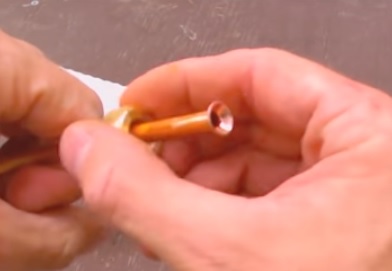
What is a Line-Set Flare?
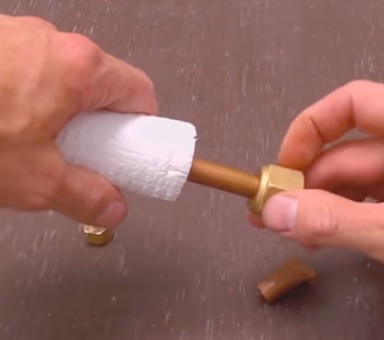
A flare is the tip of the copper line spread out so it can be attached to and bolted into place.
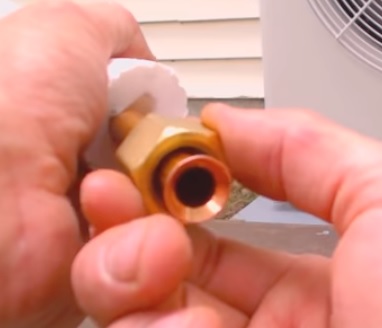
A bolt is placed on the copper line before the ends are spread out so the line can be screwed into place, creating a seal.
Tools Needed To Flare a Mini Split Line-Set
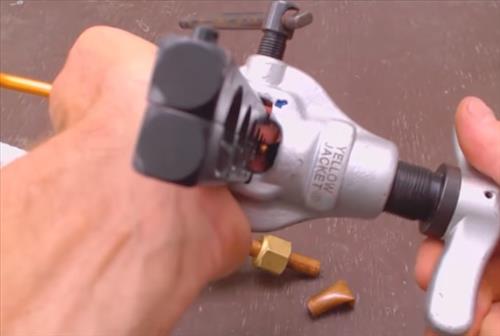
- Flare Tool
- Tube Cutter
- Deburring Tool
Some basic tools will be needed, mainly a tube cutter and flaring tool.
There are many brands and types of cutters and flare tools.
Every HVAC tech has a type of flare tool they prefer, but any will work when used correctly.
If you need to buy a flare tool, simply get the best one that will work for you.
Example Flare Tool on Amazon
Thorstone Double & Single Flaring Tool Kit for Brake Line and Brass Tubing Tool with Extra Adapters, 45 Degrees, Red
Example Tube Cutter on Amazon
RIDGID 40617 Model 101 Close Quarters Tubing Cutter with 1/4″-1-1/8″ Cutting Capacity, Silver
How To Flare a Mini Split Copper Line Set
- Cut the tip with a tube cutter.
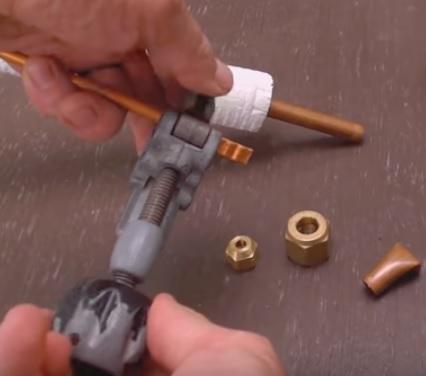
- Place the nut onto the copper tube.
- Using the correct size hole, place the Flare Tool over the copper line sticking out roughly 3/16 of an inch.
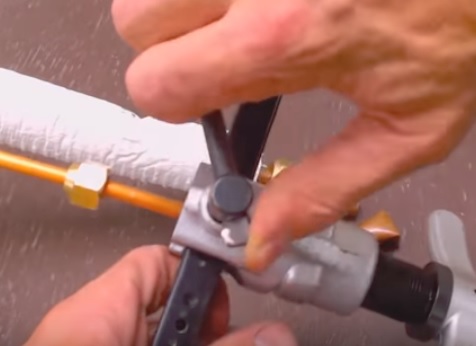
- Tighten the flare tool to hold the copper line in place.
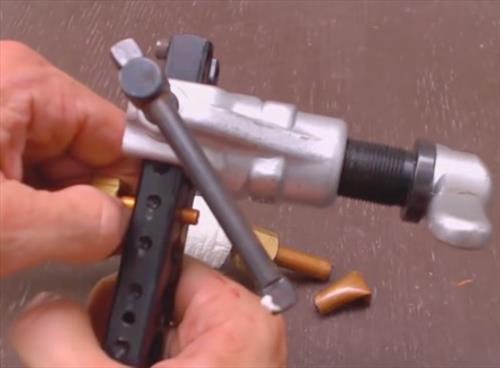
- Slowly tighten the flare tool, and it will create a flare at the tip.
- Remove the flare tool, and the tip should be flared, ready to be bolted up.
Steps To Install a Mini Split Line Set
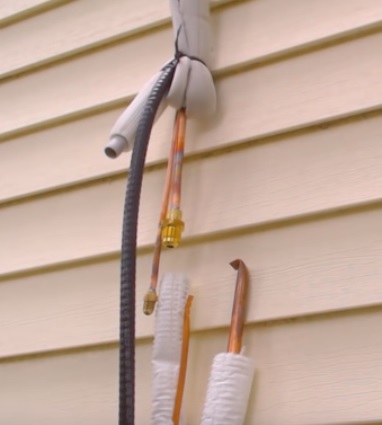
- Run the copper lines bending them to fit into place
- Flare the tips if needed.
- Add a sealant such as Nylog to the tips.
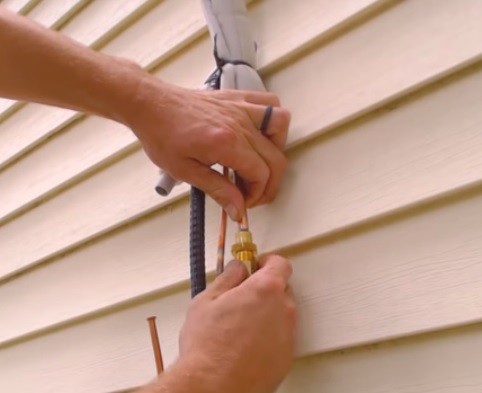
- Bolt them together, making a good seal.
When installing the copper line-set the lines will need to be bent to fit into place and along the wall.
The lines are soft and easy to bend; simply take your time so as to not kink the line and block the flow of refrigerant.
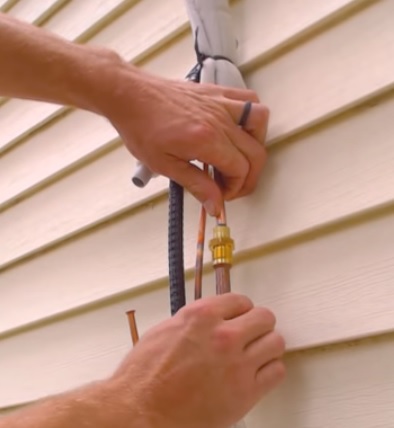
The ends will bolt together to create a seal.
Most often, Nylog is used to help the flared ends seal up.
Example Nylog on Amazon
RT201B Nylog Gasket/Thread Sealant
Tightening up the bolts on the line-set can be done without a torque wrench for those experienced enough to know when a good seal is made.
If you have limited experience, a torque wrench can be bought, and the correct tightening specifications followed.
Both methods work depending on the installer with it depending on the skill level.
Place the System in a Vacuum and Test For Leaks
Once the line-set is all connected, it needs to be put into a vacuum and tested for any leaks.
The most common method is to use an HVAC vacuum pump and gauges to set a vacuum in the lines.
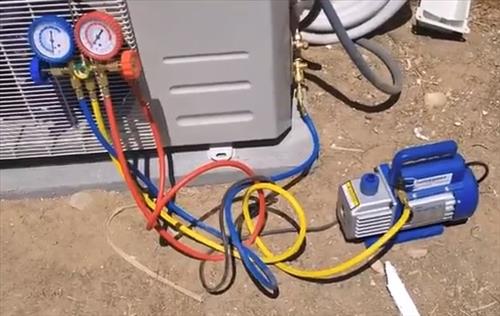
Once a vacuum is placed on the unit, it is left to sit for a while and see if the vacuum is lost.
If the vacuum is lost, there is a leak, and it needs to be fixed.
If the vacuum holds, the refrigerant can be released into the system.
Some HVAC techs will use nitrogen to pressure test the system before setting the unit into a vacuum to test for leaks.
While using nitrogen can be a good idea, it is not required as a unit not holding a vacuum has a leak.
Summary
Installing a line-set on a mini split may seem overwhelming to anyone who is new to HVAC but is not difficult for a handy DIY type person.
The main goal is to have the two lines run between the inside and outside units with a good seal.
The two copper lines need a good seal so as to be in a vacuum and not leak out any HVAC refrigerant.
Most DIY kits will come with flared tips that simply need to be tightened up.
If there is an extra length in the line, it is common to roll up the excess behind the outside condensing unit.
Some HVAC techs will cut the lines to fit without rolling them up, which is a preference.
Keep in mind if a line-set is shortened too much, the refrigerant amount will need to be adjusted.